 |
| Place of Origin: | America |
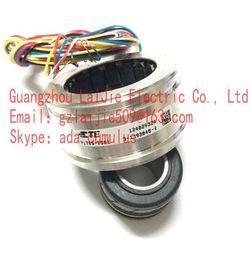
| Brand Name: | TYCO |
| Certification: | CE |
| Model Number: | V23401-T2014-B222 |
| Minimum Order Quantity: | 1pcs |
|---|---|
| Packaging Details: | carton |
| Delivery Time: | in stock |
| Payment Terms: | T/T, MoneyGram, Western Union |
| Supply Ability: | 10000pcs/week |
| TYCO: | TYCO | V23401-T2014-B222: | V23401-T2014-B222 |
|---|---|---|---|
| America: | America | Color: | Black |
| Temperature: | 50-120 | WIRE: | WIRE |
| Demention: | 100mm |
Guang Zhou Lai Jie Electric Co.,LTD
Please contact with “Tommy” for the price
V23401-T2014-B222
V23401-U6119-B609
V23401-U6019-B609
V23401-S1201-C610
V23401-T2009-B202
V23401-T2099-C502
V23401-H1005-D101
V23401-U6019-B609
V23401-T2679-C302
V23401-U6119-B609
V23401-U6019-B609
V23401-U6319-B609
V23401-T2014-B209
V23401-T2014-B209
V23401-T201E-E209
V23401-T2G09-E202
V23401-H6009-B601
V23401-D1001-B114
V23401-T2002-B209
V23401-T2009-B202
V23401-U1016-B110
V23401-T2009-E202
V23401-U6119-B609
V23401-U6019-B609
V23401-S1201-C610
V23401-H2009-B202
V23401-T2409-C502
V23401-T2509-C202
V23401-T2609-C302
![]()
![]()
![]()
Use the buttons in the toolbar of a trend window or the corresponding key combinations to browse through an archive. The values archived of a tag are displayed within a time interval in the trend window. The time interval is defined by entering a time range or by entering a start and end time. Requirement ● The buttons for browsing in archive are available only if data is supplied through archive tags. ● You have defined a time range or a start and end time.
The progress of a tag over a specified time period, beginning with the first archived value, is displayed in the trend window. The progress of a tag within the previous time interval is displayed in the trend window, starting with the currently displayed time interval. The progress of a tag within the following time interval is displayed in the trend window, starting with the currently displayed time interval. The progress of a tag over a specified time period, ending with the last archived value, is displayed in the trend window.
The following example shows the configuration of a WinCC OnlineTrendControl with two trends and the display in runtime. With key function "Configuration dialog" in runtime, you can change the display of the trends at any time and view the effects immediately
Insert the OnlineTrendControl into a picture of the Graphics Designer. 2. Configure the OnlineTrendControl properties. 3. Create a trend window.
Configure a time axis with the respective properties. Assign the time axes to the trend window. 5. Configure two value axis with the respective properties. Assign the value axes to the trend window. 6. Define two trends and assign the trends to the trend windows. Assign the trends with the time axis and the value axes. 7. Connect the two trends with an online tag for each. 8. Configure the display for each trend. 9. Save the picture with the OnlineTrendControl in the Graphics Designer. 10.Define the picture as a start picture with the example project. 11.Start runtime. 12.Start the tag simulator to supply the trends with data. 13.Deactivate runtime if you want to end the example project.
The example has a trend window embedded in a WinCC OnlineTrendControl. This chapter shows the configuration of the properties of the control and the trend window. Requirement ● You have opened a picture in the Graphics Designer. Procedure 1. Insert a WinCC OnlineTrendControl into the picture from the object palette in the Graphics Designer. Use the mouse to drag the control to the desired size. 2. Double-click in the control. The configuration dialog opens.
Select the "Normal" window heading. Activate the "Moveable", "Can Be Closed" and "Sizeable" options. "From the right" is defined as the writer orientation and updating will start when the picture is opened. 5. Save the configuration. 6. Go to the "Trend windows" tab. Define a trend window with the "New" button. The gridlines are displayed during runtime. 7. Configure the display of the ruler. If you use "Graphic" for the display of the ruler, you can configure the color and the line weight of the ruler. 8. Save the configuration.
| Go to the "Toolbar" tab. You require the following key functions to test the example: | Original view |
| Configuration Dialog | Rule |
| All key functions for zooming and moving | Rule |