 |
| Place of Origin: | America |
| Brand Name: | TYCO |
| Certification: | CE |
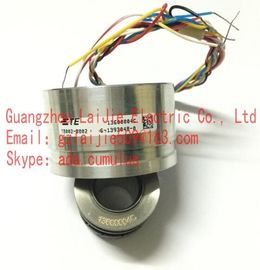
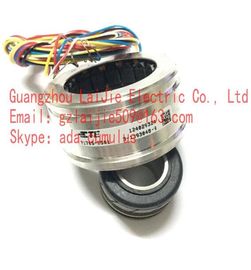
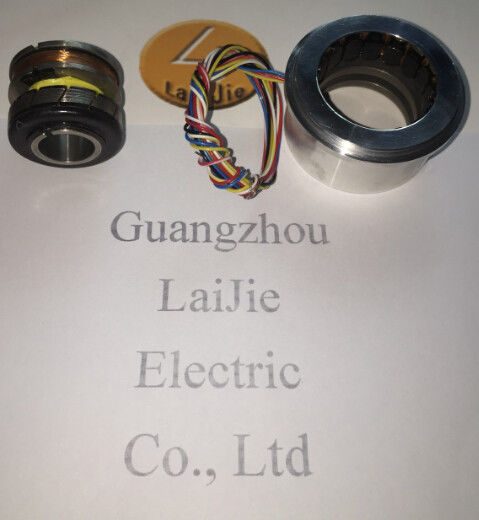
| Model Number: | V23401-T2010-B222 |
| Minimum Order Quantity: | 1pcs |
|---|---|
| Packaging Details: | carton |
| Delivery Time: | in stock |
| Payment Terms: | T/T, Western Union, MoneyGram |
| Supply Ability: | 10000pcs/week |
| TYCO: | TYCO | V23401-T2010-B222: | V23401-T2010-B222 |
|---|---|---|---|
| Material: | Iron | Color: | Black |
| Temperature: | 20-120 | Demention: | 100mm |
Guang Zhou Lai Jie Electric Co.,LTD
Please contact with “Tommy” for the price
V23401-T2010-B222
V23401-T2010-B222
![]()
![]()
![]()
You can use the selection dialog in Runtime to specify the messages to be displayed in the message window. You define new selection criteria in the selection dialog, or select an already existing selection.
The design of the selection dialog was enhanced to improve handling comfort and offers the following new properties: ● Concise input of selection criteria. ● The "*" and "?" wildcards are supported for setting a criterion. ● Saving a selection enables reuse of the selection without having to reenter the selection criteria. ● Creating several selections. ● Duplicating a configured selection ● Linking specific selections in terms of a logical "OR" operation. ● A fixed selection is available that cannot be changed in Runtime. The fixed selection and the active user-defined selections are logically linked by "AND" operation. ● All users are granted full access to all user-defined selections. ● The SQL statements you created by means of scripting, or entered in the object property "MsgFilterSQL", are written to the list of selections and provided with a comment.
Selection based on the "Acknowledged (emergency)" state is not supported for chronological reporting. Selection based on the "Acknowledged (central signaling device)" state is not supported.
Ensuring the display of all messages Observe the proper use of criteria, operands and settings of selections. Incorrectly linked criteria can lead to important messages not being displayed in the AlarmControl. Use the "Apply" button in Runtime to check the selection. Test all selections separately and before linking these, and then test the linked selections. Verify that all expected messages are also displayed in combination. This ensures that all selections are displayed in the AlarmControl.
Ensuring the display of all messages Observe the proper use of criteria, operands and settings of selections. Incorrectly linked criteria can lead to important messages not being displayed in the AlarmControl. Use the "Apply" button in Runtime to check the selection. Test all selections separately and before linking these, and then test the linked selections. Verify that all expected messages are also displayed in combination. This ensures that all selections are displayed in the AlarmControl.
You configured the "Selection dialog" button function on the "Toolbar" tab of the AlarmControl. ● You activated the message blocks that are available as the selection criteria on the "Message blocks" tab using the "Selectable in selection dialog" option. ● If a fixed selection is configured, other activated selections and the fixed selection are logically linked by "AND" operation
Click on in runtime. The "Selections" dialog opens. 2. Click "New..." to create a selection. Alternatively, you can activate existing selections by clicking in the check box in front of the selection name. 3. When creating a new selection, assign a name to the selection and an expressive comment to distinguish it from other selections. 4. Click in the first empty row of the "Criterion" column. The list with the selectable system blocks, configured user text blocks and process value blocks is displayed. Select the message block. 5. Select the suitable operand using the "Operand" column. 6. Click in the corresponding row of the "Setting" column. Depending on the text block, enter a text or a value, or select an option. 7. Click "OK". The selection is saved and is listed in the table of selections. 8. You can create other selections or edit, remove or duplicate existing selections in the selection dialog. 9. In the table, activate the selections to be included in the message window. 10.Click "Apply". The message window shows the selected messages. 11.Click "OK" to close the selection dialog.
Message locking suppresses the display and archiving of messages. You can set a lock for the following: ● Messages ● Message types ● Message classes ● Message groupsMessage locking suppresses the display and archiving of messages. You can set a lock for the following: ● Messages ● Message types ● Message classes ● Message groups
The lock of messages is not persistent. Locked messages are unlocked automatically at the restart of WinCC Runtime. Exceptions are messages that are locked directly in the AS by means of data blocks (locking via source). ● The locking of message classes and message types remains in force even after a restart of WinCC Runtime.
| In the message list, select the message row which contains the message to be locked. 2. Click the "Lock message" button . The message is removed from the message list. 3. You can view the locked message by clicking the "Lock list" button . You can enable the selected message again by clicking the "Enable message" button . The message is removed from the lock list. | |
| Users who are authorized to lock and enable messages must have been granted both authorizations in the User Administrator, and these authorizations must be configured directly one below the other. This is necessary as the authorization level defined below the authorization for "Lock Messages" in the User Administrator is used automatically as the authorization for enabling. | |
|
If locking/enabling a single message of an Alarm_8P using S7PMC, you lock/enable all 8 messages of this block.
|
Click the "Lock dialog" button . The "Configure Lock List" dialog opens. 2. Click a server in the server list, or click the local computer in the case of a single-user projects.
Click the "Add" button. Enter the message number to be locked in the next dialog
You can lock several messages simultaneously. To do this, enter the message numbers separated by commas. To select the a range of message numbers, enter a range in the form "5-10". Only uninterrupted message ranges are locked. If there are gaps in the specified range, the message "Invalid Range" is returned. 5. To enable a locked message, select the message from the list of locked messages and then click the "Delete".
You can lock and enable up to 50 messages simultaneousl
You can lock and enable up to 50 messages simultaneousl
Click the "Lock dialog" button . The "Configure Lock List" dialog opens. 2. Click a server in the server list, or click the local computer in the case of a single-user projects.
In the tree view, select a message class, a message type or a message group you want to lock. Click the "Lock" button. All messages of the specified message class, message type or message group are locked.
To enable the locked messages, select the message class, message type or message group and then click the "Enable" button.
The server list contains only those server projects whose "Packages" are loaded on the computer containing the project where you are configuring the control.