 |
| Place of Origin: | America |
| Brand Name: | TYCO |
| Certification: | CE |
| Model Number: | V23401-T2001-B202 |
| Minimum Order Quantity: | 1pcs |
|---|---|
| Packaging Details: | carton |
| Delivery Time: | in stock |
| Payment Terms: | T/T, Western Union, MoneyGram |
| Supply Ability: | 10000pcs/week |
| TYCO: | TYCO | V23401-T2001-B202: | V23401-T2001-B202 |
|---|---|---|---|
| COLOR: | BLACK | Material: | Iron |
| Temperature: | 20-120 | Demention: | 50mm |
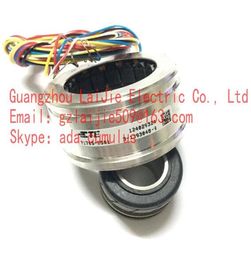
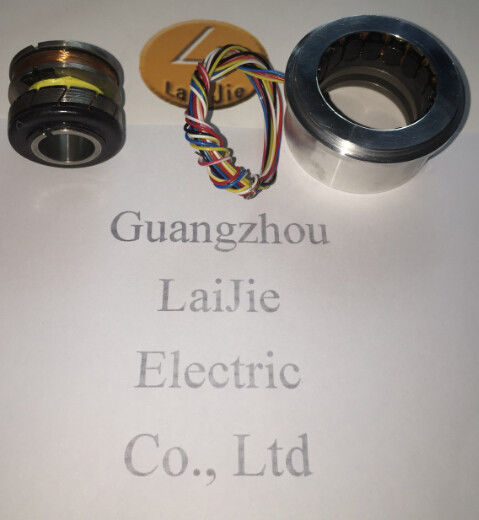
Guang Zhou Lai Jie Electric Co.,LTD
Please contact with “Tommy” for the price
V23401-T2001-B202
V23401-D1008-B114
V23401-D1008-B122
V23401-D1008-B101
V23401-D1008-B102
V23401-D1009-B114
V23401-D1009-B122
V23401-D1009-B101
V23401-D1009-B102
V23401-S1001-B122
V23401-S1001-B101
V23401-S1001-B109
V23401-S1001-B110
V23401-T1002-B114
V23401-H1002-B114
V23401-U2117-C333
V23401-T1002-B122
V23401-H1002-B101
V23401-T1002-B102
V23401-H1002-B102
V23401-T1005-B114
V23401-H1005-B114
V23401-T1005-B122
![]()
![]()
![]()
The WinCC controls are operated at runtime using the functions of the toolbar buttons. The status bar contains information pertaining to the current status of the WinCC control. You can adapt the toolbar and the status bar for all WinCC controls when configuring, or at runtime. Requirement ● A picture showing a WinCC control is opened in Graphics Designer when configuring. ● The WinCC control is assigned the "Configuration dialog" button function for opening the configuration dialog in Runtime. ● The configuration dialog of the WinCC control is open.
2. In the list, activate the button functions you require for operating the WinCC control in Runtime. For information on the button functions, refer to the description of the corresponding WinCC control at "Operation in runtime". 3. Determine the sorting order for displaying the button functions in the toolbar. Select the button functions from the list and the move the functions using the "Up" and "Down" buttons. 4. Define a shortcut key for the functions of the toolbar buttons. 5. Any button functions assigned operator authorizations are only available in Runtime to authorized users.
An activated button function is displayed during runtime if you deactivate its "Active" option, however, it cannot be operated. 7. You can set separators between the button functions. Activate the "Separator" option for the button function to be restricted by separator. 8. Configure the general properties of the toolbar, e.g. alignment or background color. How to configure the status bar 1. Go to the "Status Bar" tab. In the WinCC AlarmControl, for example:
Activate the elements required during runtime in the list of status bar elements. For further information on status bar elements, refer to the descriptions of the corresponding WinCC control at "Operation in runtime".
Determine the sorting order for displaying of the status bar elements. Select the elements from the list and move these using the "Up" and "Down" buttons. 4. To resize the width of a status bar element, deactivate the "Automatic" option and enter a pixel value for the width. 5. Configure the general properties of the status bar, e.g. alignment or background color
The hit list displays statistic calculations for archived messages in the message window. In addition to statistics, the hit list can display configured message blocks. Modifiable contents with the format specifications "@...@" are not shown in the user text blocks. Overview Customize the hit list columns which consist of message blocks and statistics data. The following statistic calculations are available for messages: ● Frequency of a message number. The frequency is only increased if the archive contains a message with "Came In" state. If the frequency of a message number in the selected message range is "0", an entry does not exist for this message number in statistics data. ● The cumulative duration of a message number for the status: – "Came In/Came In" (Message block: Sum +/+) – "Came In/Went Out" (Message block: Sum +/-) – "Came In/Initial Acknowledgment" (message block: Sum +/*1) – "Came In/Second Acknowledgment" (message block: Sum +/*2). ● The average duration of a message number for the states: – "Came In/Came In" (Message block: average +/+), – "Came In/Went Out" (Message block: Average +/-), – "Came In/Initial Acknowledgment" (message block: average +/*1) – "Came In/Second Acknowledgment" (message block: average +/*2).
Only the "Acknowledgment", "System Acknowledgment" and "Emergency Acknowledgment" states are included in the statistics calculation of acknowledgment times. Note Messages with "Acknowledgment", "System Acknowledgment", "Emergency Acknowledgment" and "Went Out" states are only included in the calculation of statistic data if the events available for statistics calculation include a corresponding, previous message with "Came In" state. If only one acknowledgment is triggered for a message with initial or second acknowledgment, the acknowledgment time is included in the calculation of the cumulative and average duration of the "Came In/Initial Acknowledgment" and "Came In/Second Acknowledgment" states. If Runtime is stopped/restarted several times and a message is pending during this time, for example, due to the external discrete alarm procedures or chronological reporting, then the message is entered several times in the archive with "Came In" state and included several times in the calculation.
You opened a picture which contains the AlarmControl in Graphics Designer. ● You configured the message blocks to be included in the hit list. ● You activated the "Hit List" button function on the "Toolbar" tab of the AlarmControl.
Go to the "Hit list" tab.
Select the message blocks to be displayed in the hit list from the list of available message blocks. Use the arrow buttons to move these message blocks to the "Selected message blocks" list. You can cut message blocks from the hit list and paste these to the "Available message blocks" list using the arrow buttons. 3. You can define the sorting order of message blocks in the hit list by selecting and then moving these using the "Up" or "Down" buttons.
| . Specify the criteria to be used for displaying messages in the hit list, | |
| such as a specific message class or a specific time range in the "Selection" area of the tab | |
| All times are included in the calculation of average values if you have not specified a time range |
that a long-range selection can adversely affect performance. Click the "Edit..." button to configure a selection or import it. The imported selection replaces the existing selection in this case. Importing selections does not require an export. You can also define selection criteria for the hit list in Runtime using the "Selection dialog" button. For further information on the selection of messages, refer to "How to select messages". 5. Define the sorting criteria for the hit list columns in the "Sorting" area of the tab, for example, first descending by date and then ascending by message number. Click the "Edit..." button to configure a sorting order. You can also define the sorting criteria for the hit list in Runtime by means of the "Sort dialog" button. 6. In the lower portion of the tab, define the settings in terms of quantity and time limits for the creation of statistics data. 7. Save the configuration.
The hit list is configured for display in the message window. Call the hit list in Runtime by clicking in the toolbar. The values in the hit list are sorted by frequency in descending order if you have not set any sorting criteria. New activated messages are not automatically included in the hit list. To include them, you must reselect the hit list.
Operation of a message can trigger an operator message. Operator messages can be triggered at the following events: ● Lock message ● Release message ● Acknowledge message ● Hide message ● Show message Configure operator messages in WinCC AlarmControl: ● If you want to use and adapt the default operator messages of WinCC ● If you want to use custom operator messages
You defined the WinCC system messages in the "Alarm logging" editor. ● In the "Alarm logging" editor, you configured the messages editor to be used as operator messages in WinCC Alarm control. ● You opened Graphics Designer and configured a picture with a WinCC AlarmControl. ● The configuration dialog of the AlarmControl is open.
In the list, activate "Operator input message for:" the events which trigger operator messages. 3. If not using the operator messages from WinCC, enter the message number of the configured message for every event. 4. Assign the message blocks of the operated message to the process value blocks of the operator message. The message blocks must be selected in the "Message Blocks" tab. 5. Define whether the contents are transferred as text or value.
An operator message is to be generated on locking a message. The content of "User text block 1" of the locked message, e.g. "Motor faulty", is to be displayed in "Process value block 1" of the operator message. This requires that you select "1" under process value as the message block of operated message "User text block 1". Note It is recommend to use message class "System, without acknowledgment" for all operator messages. Always use message classes that are configured as "without status Went Out". Note Operator messages can only be logged if corresponding system messages are set up in the message archive
Operator messages triggered by locking and unlocking messages are always assigned ● a time stamp ● name of the logged on user ● the computer name in the message archive of the alarm server concerned The time stamp for the message is derived from: ● the message source (e.g., AS), in the case of active locking and unlocking ● the alarm server (OS), in the case of passive locking and unlocking Actively locked messages are visible and operable on all WinCC servers and clients.
Operator messages triggered by locking and unlocking messages are always assigned ● a time stamp ● name of the logged on user ● the computer name in the message archive of the alarm server concerned The time stamp for the message is derived from: ● the message source (e.g., AS), in the case of active locking and unlocking ● the alarm server (OS), in the case of passive locking and unlocking Actively locked messages are visible and operable on all WinCC servers and clients.