|
| Place of Origin: | America |
| Brand Name: | TYCO |
| Certification: | CE |
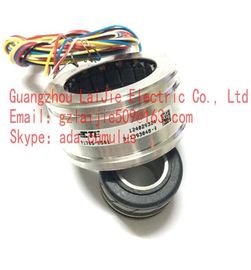
| Model Number: | V23401-T1005-B114 |
| Minimum Order Quantity: | 1pcs |
|---|---|
| Packaging Details: | carton |
| Delivery Time: | in stock |
| Payment Terms: | T/T, Western Union, MoneyGram |
| Supply Ability: | 10000pcs/week |
| TYCO: | TYCO | V23401-T1005-B114: | V23401-T1005-B114 |
|---|---|---|---|
| America: | America | Material: | Iron |
| Color: | Black | Temperature: | 20-120 |
Guang Zhou Lai Jie Electric Co.,LTD
Please contact with “Tommy” for the price
V23401-T1005-B114
V23401-T2010-B214
V23401-H2010-B214
V23401-T2010-B222
V23401-H2010-B222
V23401-T2010-B201
V23401-H2010-B201
V23401-T2010-B202
V23401-H2010-B202
V23401-T2014-B214
V23401-H2014-B214
V23401-T2014-B222
V23401-H2014-B222
V23401-T2014-B201
V23401-H2014-B202
V23401-T2014-B202
V23401-T2015-B214
V23401-H2015-B214
V23401-T2015-B222
V23401-H2015-B222
V23401-T2015-B201
V23401-H2015-B201
V23401-T2015-B202
V23401-H2015-B202
V23401-U1016-B101
V23401-U1016-B109
V23401-U1016-B110
V23401-U1016-B133
V23401-U2017-B201
![]()
![]()
![]()
You have the option of viewing six different lists in the message window: ● Message list to view currently activated messages. ● Short-term archive list, to view archived messages. The display is updated immediately after activation of new messages. ● Long-term archive list, to view archived messages. ● Lock list, to view currently locked messages. ● Hitlist, to view statistics data. ● List of messages to be hidden, to view hidden archived messages. The figure below shows an example of a message lis
Note A message is shown with a crossed-out date and time stamp in the message list if any of the following events are triggered: ● A locked message is released again. The date and time stamp shows the OS time. This also applies to chronological reporting. ● A message is reloaded after power failure. This only applies to chronological reporting. ● The AS is restarted. This only applies to chronological reporting.
Short Description of the WinCC Controls and Additional Controls (Page 368)
The messages are displayed in a message window in runtime. You can configure a corresponding WinCC AlarmControl in Graphics Designer
● A message system has been set up using the "Alarm Logging" editor. ● You configured the necessary message blocks, message classes and the message types according to requirements configured in "Alarm logging". ● You configured the necessary single messages and message groups and their properties in "Alarm logging
1. Insert the AlarmControl into a picture of Graphic Designer. 2. Configure the basic properties of the AlarmControl in the "General" tab. – The message window properties – The general properties of the control – The time base of the control – The default sorting order in the table – Properties of the long-term archive list – The action to be triggered by double-clicking in the message line
Configure the content of the message lines in the message window. The content of the message line depends on the configuration of the message blocks. Go to the "Message blocks" tab. 4. Select the "Message lists" tab to define the message blocks to be shown as columns in the message window. Use the selection dialog to define the messages to be displayed in the message window. 5. Configure the layout and properties of the message window in the "Parameter", "Effects" and "Selection" tabs. 6. Configure the toolbar and the status bar of the message window. 7. Configure a hitlist if you want to view message statistics. 8. Configure the display for the operator input messages to adapt these as required. 9. Save your configuration data.
The message content to be displayed in the message line depends on the message blocks configured. The message blocks configured in the "Alarm logging" editor can be applied without changes, or be configured in AlarmControl. Requirement ● You created a message system using the "Alarm Logging" editor. ● In "Alarm logging", you configured the message blocks to be used in the message line
1. Go to the "Message blocks" tab in AlarmControl. All of the message blocks configured in the "Alarm logging" editor are listed in "Available message blocks". The message blocks for the hitlist are also listed.
If the "Apply project settings" option is activated, the message blocks and their properties you configured in "Alarm logging" are activated in the AlarmControl. The message blocks are displayed with these properties in the message window and can only be changed by means of the Alarm logging. The message blocks of the hitlist depend on "Alarm logging". You can configure these message blocks as required. 3. Deactivate the "Apply project settings" option to let you add or remove message blocks for the message lists, or to configure message block properties. The changed properties are stored in the picture. Changes to properties made in "Alarm logging" are ignored in this control.
Activate the check box next to the name of a message block to be used in the message window in the "Available message blocks" list. 5. A selected message block can be set as criterion in the selection dialog by activating the "Selectable in selection dialog" option for this message block.
You can assign the message blocks custom names for the column header in the message window. Remove the text ID and enter a name in the "Name" field. The name is saved to the picture in the currently active language. 2. Use a corresponding entry from the text library for multi-lingual functions and for the message block names in all pictures. Enter an existing text ID from the text library in the "Text ID" field. The text ID stored in the text library is entered in the "Name" field.
Resize the message block width in the message window as required. Enter a value in the "Length in chars" field. 2. Use the "Display message colors" to determine whether or not to display the message block colors as in the central setting for the AlarmControl, or otherwise. 3. With activated "Flashing on" option, you can specify that the content of a message block flashes when a message is output at runtime. 4. Certain message blocks can also visualize the content and header in the column of the message window as an icon. The content of message block "State", for example, can be visualized in the message lists by symbols for "Came in", "Came in/Went out", "Came in/ Acknowledged", etc. Define how these message blocks should be displayed in the "Display" field. The text and icons can be displayed in parallel. 5. You can format certain message blocks. Select the message block from the "Available message blocks" list. Define the format in the "Format" field. 6. Save the configuration.
All messages are displayed in a separate message line in the message windows. The content of the message window is determined by the message blocks and messages selected. Prerequisite ● You created a message system using the "Alarm Logging" editor. ● You configured the message blocks to be used in the message line.
| Define the message window content on the "Message lists" tab. | |
| Select the "Available message blocks" list and select the configured message blocks to be displayed in the message lists | |
| . Use the arrow buttons to move these message blocks to the "Selected message blocks" list. U |