 |
| Place of Origin: | Japan |
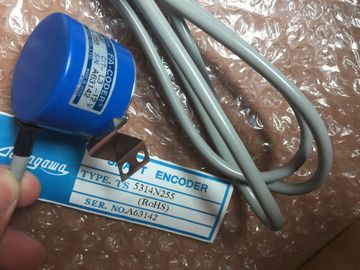
| Brand Name: | Tamagawa |
| Certification: | CE |
| Model Number: | TS5208N510 |
| Minimum Order Quantity: | 1pcs |
|---|---|
| Packaging Details: | carton |
| Delivery Time: | in stock |
| Payment Terms: | T/T, Western Union, MoneyGram |
| Supply Ability: | 100pcs/week |
| Tamagawa: | Tamagawa | TS5208N510: | TS5208N510 |
|---|---|---|---|
| Japan: | Japan | Material: | Iron |
| Wire: | Wire | Temperature: | 20-120 |
| Color: | Black | Demention: | 50mm |
TS3103N156
TS5208N510
TS3166N43
TS3212N32
TS3214N12
TS3214N13
TS3214N15
TS3214N16
TS3214N44
TS3218
TS3218N42
TS3218N5
TS3250E12
TS3275N125
TS3153N15E18
TS3602N213E8
TS3602N233E8
TS3602N31E8
TS3617N1E1
TS3617N1E2
TS3617N11E1
TS3617N1E3
TS3617N2E4
TS3617N2E5
![]()
![]()
![]()
| By changing the base for the time settings you can convert the time specified in the time stamp of the report data to a different time base. | |
| The time settings are only converted for the output in the report and are not written back to the alarm logging | |
| If, for example, you want to output the data of a remote computer in another time zone, |
you can use this function to ensure that the data is output with a comparable time. If the two computers in this case were working with the "Local Time" time base, you would receive reports on the two computers with different times. The results would not be directly comparable. You can find additional information in the section "Adjusting the Time Settings in the Project". If you change the time base for the output, ensure that the time reference is also output in the report. For example, specify an identifier in the alias for the "Time" message block. You can find additional information "Changing the Output Options for the Message Sequence Report
You can change the time base in the "Table" area. To do this, click the "Time Base..." button. The "Time Base Entry" dialog appears. Select the time base from the list.
The line layout editor is only used to create and change line layouts for the message sequence report. It therefore has a very simple layout and is easy to use. This section describes how you can do the following: ● Set the page size of a line layout ● Create the header and footer ● Create a table in the line layout ● Change the output options for the message sequence report
You can set the page size and margins for each line layout within the permissible limits. You can set the desired values either by using the controls or by entering them directly in the fields. The following limits apply to the line layout: Number of lines Values between 20 and 400 are valid. Number of columns Values between 20 and 400 are permissible. Margin width Values between 0 and 30 are permissible.
Select an existing line layout in WinCC Explorer or create a new line layout and open it in the line layout editor. 2. Set the number of lines per page in the "Page Size" area by using the corresponding controls or by entering a value.
Set the number of columns (= characters per line) in the "Page Size" area by using the corresponding controls or by entering a value. 4. Set the width of the margins for output in the "Margins" area by using the controls or entering values. 5. Save the changes and close the line layout editor
You can create a header and footer for each line layout in the line layout editor. They are then output with each page. Headers and footers consist of text only and can have a maximum of 10 lines each. You can set the number of lines for headers and footers separately by using the corresponding controls or by entering values directly. Lines of text that are longer than the page width set in the "Page Size" area (number of columns =characters per line) are truncated at output.