 |
| Place of Origin: | Japan |
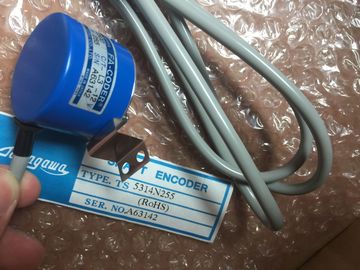
| Brand Name: | Tamagawa |
| Certification: | CE |
| Model Number: | TS5013N66 |
| Minimum Order Quantity: | 1pcs |
|---|---|
| Packaging Details: | carton |
| Delivery Time: | in stock |
| Payment Terms: | T/T, Western Union, MoneyGram |
| Supply Ability: | 100pcs/week |
| TAMAGAWA: | TAMAGAWA | TS5013N66: | TS5013N66 |
|---|---|---|---|
| Material: | Iron | Wire: | Wire |
| Temperature: | 30-80 | Dimension: | 70mm |
| Color: | Black |
| "Project tree": Right-click the program element, and then click the context-sensitive "Download" selection. |
You can also copy the program blocks from an online CPU or a memory card attached to |
| "Online" menu: Click the "Download to device" selection. | your programming device. Prepare the offline project for the copied program blocks: |
| Toolbar: Click the "Download to device" icon. | Add a CPU device that matches the online CPU. |
Guang Zhou Lai Jie Electric Co.,LTD
TS5013N66
TS3667N12E6
TS3667N31E7
TS3667N13E8
TS3624N1E1
TS3624N1E2
TS3624N2E3
TS3624N2E4
TS3624N3E5
TS3624N3E6
TS3630N1E1
TS3630N1E2
TS3630N2E3
TS3630N2E4
TS3630N3E5
TS3630N3E6
TS3630N1303E9
TS3630N1306
TS3630N11E1
TS3630N11E2
TS3630N12E3
TS3630N12E4
Expand the CPU node once so that the "Program
blocks" folder is visible.
To upload the program blocks from the online CPU to the
offline project, follow these steps:
1. Click the "Program blocks" folder in the offline project.
2. Click the "Go online" button.
3. Click the "Upload" button.
4. Confirm your decision from the Upload dialog
(Page 675).
As an alternative to the previous method, follow these
steps:
1. From the project navigator, expand the node for
"Online access" to select the program blocks in the
online CPU:
2. Expand the node for the network, and double click
"Update accessible devices".
3. Expand the node for the CPU.
4. Drag the "Program blocks" folder from the online CPU
and drop the folder into the "Program blocks" folder of
your offline project.
5. In the "Upload preview" dialog, select the box for
"Continue", and then click the "Upload from device"
button.
When the upload is complete, all of the program blocks,
technology blocks, and tags will be displayed in the offline
area.
Note
You can copy the program blocks from the online CPU to an existing program. The
"Program-blocks" folder of the offline project does not have to be empty. However, the
existing program will be deleted and replaced by the user program from the online CPU. You can use the "Compare" editor (Page 681) in STEP 7 to find differences between the
online and offline projects. You might find this useful prior to uploading from the CPU. As shown in the following table, you can monitor and modify values in the online CPU.
Table 6- 5 Monitoring and modifying data with STEP 7 Watch tables and force tables
You use "watch tables" for monitoring and modifying the values of a user program being
executed by the online CPU. You can create and save different watch tables in your project
to support a variety of test environments. This allows you to reproduce tests during
commissioning or for service and maintenance purposes.With a watch table, you can monitor and interact with the CPU as it executes the user
program. You can display or change values not only for the tags of the code blocks and data
blocks, but also for the memory areas of the CPU, including the inputs and outputs (I and Q),
peripheral inputs (I:P), bit memory (M), and data blocks (DB).
With the watch table, you can enable the physical outputs (Q:P) of a CPU in STOP mode.
For example, you can assign specific values to the outputs when testing the wiring for the
CPU.
STEP 7 also provides a force table for "forcing" a tag to a specific value. For more
information about forcing, see the section on forcing values in the CPU (Page 689) in the
"Online and Diagnostics" chapteThe force values are stored in the CPU and not in the watch table.
You cannot force an input (or "I" address). However, you can force a peripheral input. To
force a peripheral input, append a ":P" to the address (for example: "On:P").
The Inspector window displays cross-reference information about how a selected object is
used throughout the complete project, such as the user program, the CPU and any HMI
devices. The "Cross-reference" tab displays the instances where a selected object is being
used and the other objects using it. The Inspector window also includes blocks which are
only available online in the cross-references. To display the cross-references, select the
"Show cross-references" command. (In the Project view, find the cross references in the
"Tools" menu.) You do not have to close the editor to see the cross-reference information.
You can sort the entries in the cross-reference. The cross-reference list provides an
overview of the use of memory addresses and tags within the user program.
● When creating and changing a program, you retain an overview of the operands, tags
and block calls you have used.
● From the cross-references, you can jump directly to the point of use of operands and
tags.